NPATI Content Automation brings marketplace publishing, social media scheduling and WordPress content planning into one WordPress workspace.
Instead of switching between your WordPress dashboard, marketplace account, social networks and separate content planning tools, you can manage many of these workflows directly from WordPress.
The plugin connects WordPress with Npati and NPATI Hub, giving sellers, creators, bloggers, publishers and businesses a practical way to manage content from one place.
You can create marketplace listings, upload product photos and videos, review your Npati videos and Shorts, schedule social media content, plan WordPress articles, generate article content with your own OpenAI API key and review important connection security information.
The plugin itself is completely free to install and use.
OpenAI is optional. If you decide to connect your own OpenAI API key and use AI content generation, OpenAI may charge your OpenAI account for API usage. NPATI does not add a separate charge for using the plugin.
The source code is publicly available on GitHub.
Getting Started with NPATI Content Automation
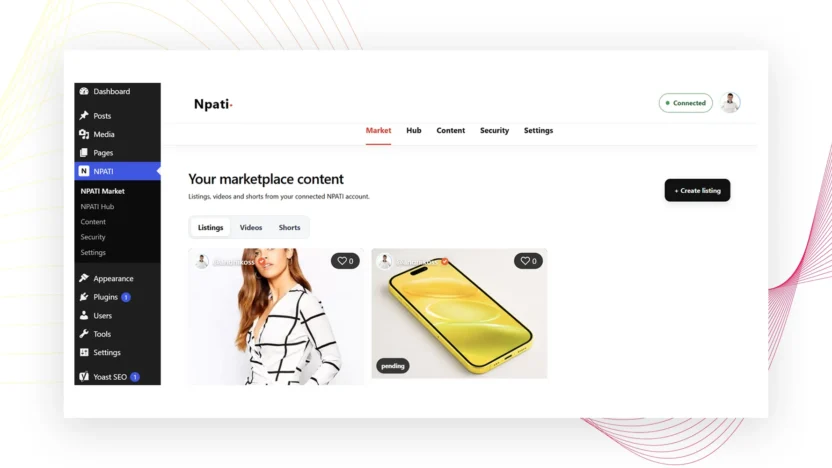
After installing and activating NPATI Content Automation, open NPATI from your WordPress administration menu.
You will need to connect a Npati account before using the connected marketplace and Hub features.
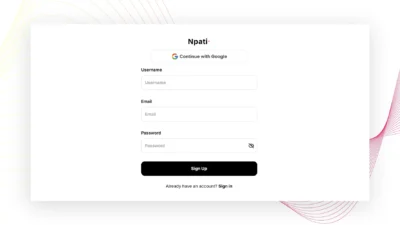
You can sign in to an existing account or create a new one.
The basic setup process is simple.
- Install and activate NPATI Content Automation.
- Open NPATI inside WordPress.
- Sign in to your Npati account or create a new account.
- Review the permissions requested by the plugin.
- Approve the connection.
- Return to WordPress.
- Start using Market, Hub and Content.
If you have never used Npati before, you can first read our How to Create a Npati Account guide.
You may also want to complete your account before publishing marketplace content.
Read How to Set Up Your Npati Profile and How to Add an Address to Npati if you are preparing a new seller account.
Once your account is connected, the plugin becomes a workspace for marketplace content, social publishing and WordPress editorial planning.
Market: Create and Manage Npati Marketplace Content
The Market area contains three main sections:
Listings
Videos
Shorts
Each section connects directly with content associated with your Npati account.
Create a Npati Listing from WordPress
Open Market, select Listings, then click Create listing.
The first part of the form contains the main information about your product.
Title
Enter a clear product title.
The title can contain up to 60 characters, so it should immediately explain what you are selling.
For example:
Apple iPhone 14 Pro 128GB Midnight
A useful title can include the brand, product name, model, capacity, size, important variation or other details that help a buyer understand the item.
For more advice about titles and descriptions, read How to Write a Better Npati Listing.
Category
Choose the category that best represents the item.
Using the correct category helps organize your marketplace content and makes the listing easier for relevant buyers to discover.
Product Description
The Product Description field gives you space to explain the item in more detail.
You can describe its condition, features, specifications, included accessories and any other information that may be useful to a potential buyer.
Try to answer the questions a buyer would normally ask before contacting you.
A clear description can reduce unnecessary questions and make the listing more useful.
If you want a complete guide to the standard Npati listing process, read How to Create a Listing on Npati.
Add Up to Six Product Photos
The Product Photos area allows you to upload up to six images.
You can drag your photos into the upload area or select them directly from your device.
Using several clear product photos gives buyers a better understanding of what you are selling.
Try to show the item from useful angles and make important details visible.
If the product is used, photos can also help show its actual condition.
For more practical advice about marketplace images, see How to Add Photos to a Npati Listing.
Preview Your Listing Before Publication
One of the useful parts of the listing editor is the preview shown on the right side of the page.
As you add product media, you can see how the listing will appear.
When several photos are uploaded, the preview becomes a carousel.
You can move through the images and review how each photo appears before publishing.
This makes it easier to spot an image you may want to replace or adjust before the listing becomes public.
Label Product Photos by Color
Some products are easier to understand when each image can be associated with a specific color.
Enable Label photos by color and a small field becomes available for individual photos.
You can enter the relevant color for each image.
This can be particularly useful for products that have several variations, such as clothing, accessories, furniture, electronics or other items where color matters.
A buyer can then understand which variation is represented by each image.
Add Product Video and a Thumbnail
Photos are useful, but some products are easier to understand through video.
The Video and thumbnail section lets you upload a product video of up to 2 GB.
A thumbnail can also be used for the video presentation.
You can create a listing that contains up to six product photos together with a product video.
In this format, buyers can first browse the photo carousel and then continue to the video.
When the video is reached in the preview carousel, it can begin playing so you can see how the complete listing experience will look.
This gives sellers an opportunity to combine detailed photography with video demonstration in the same marketplace listing.
Product video can be especially useful for electronics, vehicles, tools, furniture, appliances and other products where movement, condition, sound or functionality may be important.
Read How to Add Product Video to a Npati Listing for more ideas.
Create a Larger Video Presentation
You do not have to use six photos with every listing.
If you remove the product photos and keep the product video and thumbnail, the presentation can switch to a larger video format.
This gives you two different ways to present an item.
You can create a listing with multiple photos and video, or you can focus primarily on video and use the larger video presentation.
There is no single format that is best for every product.
A used smartphone may benefit from several detailed photos together with a demonstration video.
Another product may be easier to present with one strong video that immediately shows what the item does.
Choose the format that communicates the product most clearly.
Set the Price and Publish Your Listing
Once the main product information and media are ready, complete the pricing information and review the listing one more time.
When everything looks correct, publish it.
The listing becomes available through the plugin and appears in your connected Npati account.
This means you can create marketplace content directly from the WordPress workspace without having to recreate the same listing manually inside Npati.
If you later need to change information in a listing, read How to Edit or Update a Npati Listing.
Videos Inside the Market Workspace
The Videos section displays videos associated with your Npati profile.
You can review your video content directly from the WordPress plugin.
If viewers have left comments on your videos, you can also review the conversation and respond when needed.
This is particularly useful for sellers and creators who use video regularly and want to keep marketplace and video activity closer to their WordPress workflow.
You can also use Npati Analytics to review views, likes, comments and other activity connected with listings, videos and Shorts.
Shorts Inside WordPress
The Shorts section displays the short videos published through your Npati profile.
Shorts can be useful for quick product demonstrations, announcements, product details, seller updates and other short video content.
Instead of opening a separate Npati page each time, you can review your Shorts from the plugin workspace.
If you have not created a Short before, read How to Upload a Short Video on Npati.
Hub: Manage Social Media Publishing
The Hub workspace connects WordPress with NPATI Hub.
It contains four main sections:
Overview
Create Post
Calendar
Connections
NPATI Hub is where supported external services can be connected to your account.
Once a service is connected, the plugin can display the connection and use it for supported publishing workflows.
Hub Overview
The Overview section gives you a central view of your publishing activity.
You can review planned publications and see calendar information showing when content has been scheduled or published.
The same area also displays services connected through your NPATI Hub account.
Instead of checking every social platform individually just to understand what is planned, you can use Overview as a quick summary of your current publishing workflow.
Create and Schedule Social Posts
Open Create Post when you want to prepare content for a connected social service.
You can select a destination, create the content and choose when it should be published.
This allows you to prepare content in advance instead of manually opening every social network when it is time to publish.
Posts can also be reviewed and edited when changes are needed before publication.
For businesses, publishers and creators who maintain several channels, this can make content planning significantly easier.
You can prepare content today and schedule it for another date and time that fits your publishing plan.
Social Media Calendar
The Calendar section gives you a larger view of scheduled and completed publishing activity.
It helps you understand which days already contain content and where there is space for additional publications.
This is useful when you are managing several social networks or preparing content for several days or weeks.
You can use the calendar to create a more consistent publishing schedule rather than managing every post independently.
Connections
The Connections section shows the integrations connected to your NPATI Hub account.
If you want to add another service, open NPATI Hub and complete the connection process there.
When a provider requires authorization, its secure sign in page opens through NPATI Hub.
After you approve access, you return to your workspace and the connected service can become available inside the plugin.
This approach means that social integrations are managed through NPATI Hub rather than asking you to enter social access tokens directly into WordPress.
Content: Plan and Publish WordPress Articles
The Content workspace is designed for WordPress editorial planning.
You can use it for a single article or for a larger publishing schedule.
When creating an article task manually, you can provide information such as the article title, description, keywords, category, publication date and publication time.
You can write the content yourself or use the optional OpenAI connection to assist with article generation.
This makes the Content area useful both for people who prefer manual writing and for users who want to automate part of their editorial workflow.
Plan Articles for Future Publication
Instead of writing and publishing everything immediately, you can plan articles for specific days and times.
For example, you might prepare several topics at the beginning of the month and distribute them across your editorial calendar.
Each planned article becomes part of the Content workflow and can be reviewed before publication.
This gives you more control over publishing consistency and helps avoid creating content without a schedule.
Import Article Tasks in Bulk
You can also prepare content tasks in a file and import them into the Content workspace.
This is useful when you already have a larger editorial plan containing article topics, descriptions, keywords, categories and publication information.
Instead of creating every task separately, the information can be prepared in advance and added in bulk.
This can save considerable time for blogs, publishers, agencies and businesses that manage many planned articles.
Manage Planned Articles
Scheduled content is not locked after you create it.
You can review your planned articles and make changes when necessary.
Available workflow actions include editing, copying, changing schedules and deleting content tasks.
You can also work with several planned items when you need to clean up or reorganize a larger editorial schedule.
All planned content can be viewed in the calendar, making it easier to understand your publishing schedule.
Turn Published Articles into Social Content
Publishing the article does not have to be the end of the workflow.
After an article has been published, the Content area can help prepare a shorter version of its key information for social media.
Instead of copying the complete article into a social post, you can create a concise version suitable for sharing.
That social content can then be scheduled for a connected destination on a date you choose.
This creates a practical workflow where one WordPress article can continue into your social media publishing plan.
You create the article once, publish it to your blog, prepare a shorter social version and schedule it through your connected publishing workflow.
Optional OpenAI Content Generation
OpenAI is not required to use NPATI Content Automation.
You only need an OpenAI API key if you want to use supported AI writing features.
Your own API key is connected from the Settings page.
After connecting it, you can select an available compatible model and use OpenAI when you want assistance generating article content.
If you prefer to write manually, you can continue using content planning and scheduling without connecting OpenAI.
Settings
The Settings page gives WordPress administrators control over important plugin behavior.
Default WordPress Author
Choose which WordPress user should be used as the default author for created content.
This is helpful on sites where several authors or administrators work together.
Store Link
You can explicitly choose whether you want a link to your Npati store displayed in the website footer.
This setting is optional and remains under your control.
Security Mode
Select the security mode appropriate for your WordPress installation and connected workflow.
Hub to WordPress Publishing
You can decide whether signed commands from NPATI Hub are allowed to publish content directly.
If direct publishing is not enabled, content received through that workflow can remain as drafts instead.
This gives administrators control over whether remote content can become public automatically.
Audit Retention
Choose how long plugin activity records should be retained.
This makes it possible to keep useful operational history without storing activity indefinitely.
Uninstall Cleanup
You can decide whether plugin settings and local integration tables should be removed when the plugin is uninstalled.
This gives administrators control over what remains on the WordPress installation after removal.
OpenAI Connection Settings
The OpenAI connection is also managed from Settings.
You can enter your OpenAI API key, test the connection, select an available model, save the configuration or disconnect OpenAI.
The API key is encrypted and stored on your WordPress site.
It is not sent to NPATI Hub.
This design allows the WordPress site owner to control the OpenAI connection directly.
You can choose from compatible OpenAI models available through the plugin rather than being forced to use one fixed model.
Security Status and Activity
The Security section provides a simple overview of the connection status and recent plugin activity.
It can show information about HTTPS, your NPATI connection, webhook signature verification and recent requests.
The plugin also makes an important distinction regarding social credentials.
Social access tokens are not stored in WordPress.
The Security area can also display recent successful and failed API activity, webhook events and connection events.
This gives administrators a place to review whether connections are working and identify recent failures when troubleshooting is necessary.
For a plugin that can connect WordPress with external publishing workflows, visibility into connection status is an important part of administration.
Who Is NPATI Content Automation For?
🛍️ Marketplace Sellers
If you sell products through Npati, the plugin lets you create marketplace listings directly from WordPress.
You can add titles, descriptions, categories, prices, photos and product video without leaving your WordPress workspace.
🏪 Small Businesses
Businesses often manage a website, marketplace listings, social media and blog content separately.
NPATI Content Automation brings several of these workflows into one administration area.
You can manage marketplace content, social publishing and WordPress editorial planning from the same plugin.
✍️ Bloggers and Publishers
The Content workspace is useful for publishers who want to plan articles before publication.
You can organize topics, descriptions, keywords, categories, dates and times, then manage them through an editorial calendar.
OpenAI can also be connected when you want optional assistance with content generation.
📣 Social Media Managers
The Hub workspace helps users who manage content across connected services.
Posts can be prepared in advance, scheduled and reviewed through the calendar.
This can reduce the need to manually open each service whenever content needs to be published.
🎬 Video Creators
Creators who use Npati videos and Shorts can review their content from the Market workspace.
Marketplace listings can also combine product photography with video, allowing creators to present products more visually.
⚙️ WordPress Administrators
Administrators maintain control over important settings such as authors, publishing permissions, OpenAI connection, security status, audit retention and plugin cleanup.
What Makes NPATI Content Automation Different?
Marketplace and WordPress in One Workspace
Most WordPress content tools focus only on posts and pages.
NPATI Content Automation also connects WordPress with marketplace publishing.
A seller can create a Npati listing without leaving WordPress.
Marketplace Listings with Photos and Video
Listings can include up to six product photos together with video.
You can preview the result and choose between a richer photo presentation with video or a larger video focused layout.
Social Publishing through NPATI Hub
The plugin does more than create WordPress content.
Connected social services can become part of the same publishing workflow through NPATI Hub.
WordPress Editorial Planning
Content can be prepared ahead of time instead of being created only when it needs to be published.
Manual tasks and bulk planning make the plugin useful for both individual bloggers and larger editorial workflows.
Optional OpenAI Integration
AI features are optional.
You decide whether OpenAI should be connected.
You use your own API key.
You select an available compatible model.
If you do not want AI generated content, you can continue using the other plugin features without OpenAI.
Your OpenAI Key Stays with Your WordPress Site
The OpenAI API key is encrypted and stored on your WordPress installation.
It is not sent to NPATI Hub.
Social Tokens Are Not Stored in WordPress
Social connections are handled through NPATI Hub.
WordPress does not need to store your social service access tokens.
Content Can Continue After Publication
A WordPress article does not have to remain isolated inside the blog.
After publication, you can prepare shorter social content and schedule it for a connected destination.
This helps turn a single article into part of a wider content distribution workflow.
NPATI Content Automation Is Free
NPATI Content Automation is completely free to install and use.
There is no plugin subscription required to access the plugin itself.
You can use the marketplace, content planning, calendar, connection and supported publishing functionality without paying NPATI for the WordPress plugin.
OpenAI is optional.
If you connect your own OpenAI API key and request AI generated content, API usage is associated with your OpenAI account and may be billed by OpenAI according to its current API pricing.
NPATI does not add an additional fee to your OpenAI API usage through the plugin.
This also means you remain in control.
If you do not need AI generation, simply leave OpenAI disconnected.
A Practical Content Workflow
One of the main advantages of the plugin is that its different sections can work together.
A typical workflow might look like this:
- Connect your Npati account to WordPress.
- Create a marketplace listing from Market.
- Add photos and product video.
- Publish the listing to your Npati account.
- Create related social content through Hub.
- Schedule the social publication.
- Plan a detailed WordPress article through Content.
- Publish the article on your blog.
- Create a shorter social version of the published article.
- Schedule that content for a connected social service.
This allows marketplace content, blog content and social publishing to become parts of one larger content workflow.
Frequently Asked Questions
Is NPATI Content Automation free?
Yes. The WordPress plugin is free to install and use.
OpenAI is optional. If you connect your own OpenAI API key and use AI features, OpenAI may charge your account for the API requests you make.
Do I need a Npati account?
Yes, a Npati account is required for connected marketplace and NPATI Hub functionality.
If you do not have one yet, follow the How to Create a Npati Account guide.
Is OpenAI required?
No.
You only need OpenAI when you want to use supported AI writing functionality.
The rest of the plugin can be used without connecting an OpenAI API key.
Where is the OpenAI API key stored?
The key is encrypted and stored on your WordPress site.
It is not sent to NPATI Hub.
Can I choose an OpenAI model?
Yes.
After connecting OpenAI, you can choose from compatible models available through the plugin.
Can I create Npati marketplace listings from WordPress?
Yes.
Open Market and then Listings to create a marketplace listing from your WordPress dashboard.
You can add product information, photos, video and pricing before publication.
How many photos can I add to a listing?
You can upload up to six product photos.
Can I add video to a marketplace listing?
Yes.
A product listing can include video together with product photos, or you can use a larger presentation that focuses primarily on video.
Can I schedule social media posts?
Yes.
Connect supported services through NPATI Hub, then use the Hub workspace inside the plugin to prepare and schedule supported publications.
Are my social access tokens stored in WordPress?
No.
Social access tokens are not stored in WordPress.
Can I plan WordPress articles in advance?
Yes.
The Content workspace lets you create article tasks with titles, descriptions, keywords, categories, dates and publication times.
You can also manage larger editorial schedules and import prepared content tasks.
Can I edit scheduled content?
Yes.
Planned content can be reviewed and managed before publication.
You can edit, copy, reschedule or delete planned content when necessary.
Learn More About Npati
NPATI Content Automation is part of a wider Npati ecosystem that connects marketplace content, video, social publishing and WordPress workflows.
Explore NPATI Plugins to discover available WordPress tools and integrations from Npati.
Visit the Npati website to explore the marketplace and social platform.
Open NPATI Hub to connect supported publishing services and manage social integrations.
Browse the Npati Blog for tutorials and practical marketplace guides.
You can also explore the complete Npati Guides collection.
For marketplace specific help, browse the Listings, Photos and Videos topics.
Useful guides include:
- How to Create a Npati Account
- How to Set Up Your Npati Profile
- How to Add an Address to Npati
- How to Create a Listing on Npati
- How to Write a Better Npati Listing
- How to Add Photos to a Npati Listing
- How to Add Product Video to a Npati Listing
- How to Upload a Short Video on Npati
- How to Use Npati Analytics
- How to Edit or Update a Npati Listing
Get NPATI Content Automation
If you use WordPress and want one workspace for Npati marketplace listings, social publishing, editorial planning and optional OpenAI content generation, NPATI Content Automation gives you a practical way to connect these workflows.
The plugin is free and its source code is publicly available.
Visit the official NPATI Content Automation plugin page to learn more about the plugin, or explore all available tools on the NPATI Plugins page.
Create or manage your account at Npati.
Connect your publishing services through NPATI Hub.
Then open NPATI inside WordPress and start building your publishing workflow.